Note that for this challenge we will need access to two educational sets or one retail kit set.
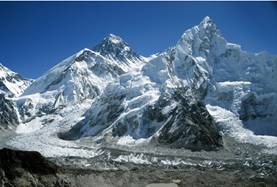
In 1963 Edmund Hillary and Tensing Norgay were the first to climb the highest mountain in the world, called Mount Chomolungma by Tibetans and Mount Everest by Europeans. Do you know where it is on the map?

I was lucky enough to speak with the charming and humble Tenzing Norgay when I worked with the Australian Volunteers Abroad programme in Darjeeling, India. Tenzing spoke movingly about what his achievement meant to him. I was inspired, and later climbed a little way beyond the Everest base camp.
Would you like to climb a mountain? Some mountain climbing is dangerous, and anyway some of us are afraid of heights - could we get a robot to do the climbing for us?
30.1 Robot Mountain Climbing
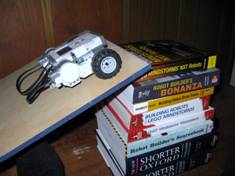
Most Schools don’t have mountains in their backyards, so let us try imitating the slope of the side of a mountain by using a board that can be tilted at an angle to the floor; the steeper the board, the more difficult it will be for our robot to climb it.
30.2 Our Mountain Side
A board about a metre long would be good. If the board was wider than about a quarter of a metre it should hopefully provide sufficient space so that there will not be a big chance of our robot running off the edge and falling apart.
We will need something to put under one end of the board to change the flat board into a mountain side. I’ve used books, but anything similar would be good.
30.3 A Mountain-climbing Program
This has to be one of the shortest programs that we have ever created!


30.4 How Steep?
Now comes the fun bit!
How many books (or whatever you are using) can you place under one end of your mountain side before your robot has trouble climbing?
If your robot is like mine, it will start to have problems when the height of one end of our mountain side is about 1/3 of the length of the mountain side. What can we do to climb steeper slopes?
30.5 Off-Road Robots
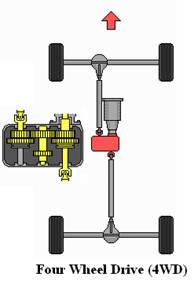
Our robot has two motors that drive two wheels. When people choose a car to go off-road they often choose car that drives all four wheels. Can we make a robot that can drive four wheels – and would it be better at climbing mountain sides than our two-wheel drive robot? How could we do that? – Have a think about it. - How we could make our robot motors drive four wheels?
Come to think of it, a car has only one motor, and that one motor can drive all four wheels – how does the car do that?
There is more about how car four-wheel drives work at http://auto.howstuffworks.com/four-wheel-drive.htm . This web page contains some nice diagrams, but do not worry about the detail on this page too much unless you are REALLY interested – as it contains far more information then we need for Challenge 30.
30.6 Good Gear(s)
A car uses gears between the engine and the wheels to drive all four wheels from the one motor.
What are gears? They are like circular bit of metal that have teeth around their edges.
We have some gears in our LEGO set that are similar to the ones used in cars, but ours are made of plastic instead of metal.
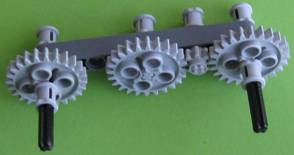
These are three different LEGO gears. We will be using the two smaller ones.
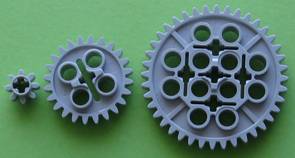
These gears have 8, 24 and 42 teeth (one of these numbers is wrong – find the gears and count the teeth to see which count is incorrect).
Let us try using some gears to make our robot four-wheel drive.
30.7 A Four-Wheel Drive Robot
Since you are quite experienced in building robots by now, we will only give you instructions for modifying one side of Robot 2. After you have finished the first side, you can change these instructions to modify the second side of Robot 2.
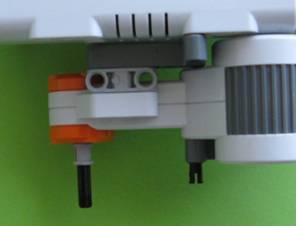
30.7.1 Adding side attachment points.
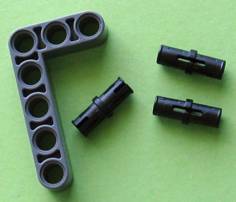
Find these pieces, and add them to your robot as shown in the right picture at the bottom of the previous page.
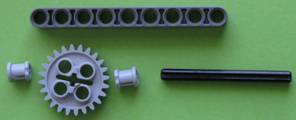
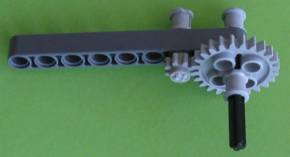
30.7.2 Adding the First Gear
Find the pieces (the axle is 6 or 7 LEGO holes long) in the left image, and assemble them to match the image on the right.

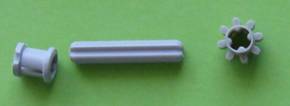
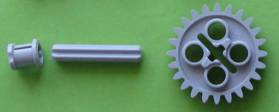
30.7.3 Adding the Second Gear
Find the pieces (the axle is 3 LEGO holes long) in the left image, and assemble them to match the image on the right
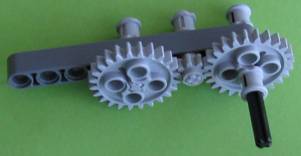
30.7.4 Adding the Third Gear
Find the pieces (the axle is 3 LEGO holes long) in the left image, and assemble them to match the image on the right.
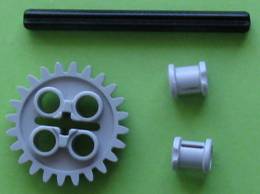
30.7.5 Adding the Fourth Gear
Find the pieces (the axle is 6 or 7 LEGO holes long) in the left image, and assemble them to match the image on the right.
30.7.6 Remove the Tyre from the Robot.
If the driving axle does not have a large bush on it already, add one in the position shown in the image to the left.
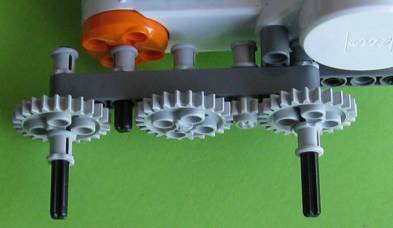
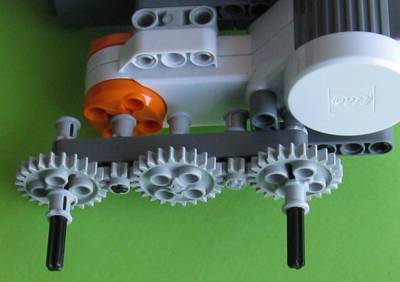
30.7.7 Adding the Gears to the Robot
The gears are now added to the robot, in the positions shown below.
30.7.8 Adding the Driving Gear to the Robot
The small driving gear is now added to the Robot. Note that it may be necessary to wiggle the gears to help fit this gear in to the place shown in the image below.
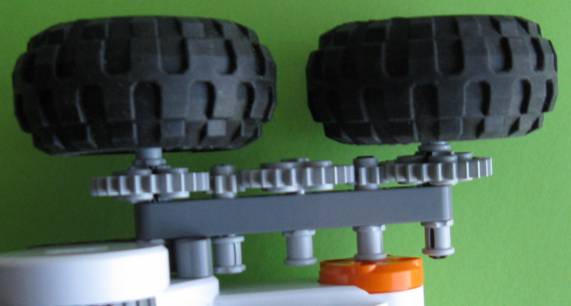
30.7.9 Adding the Tyres to the Robot
The tyres are now added, as shown below.
30.7.10 The Other Side of the Robot
Now modify instructions 30.7.1 to 30.7.9 to add the gears to the other side of your robot. When this is complete, your robot will probably look like this:-

30.8 How Does your 4-Wheel Drive Robot Behave?
Now test your Robot.
30.9 Changes Caused by Gearing…
As you will have seen, using gears changes the direction, speed and the climbing ability of your robot. Both depend on the number of teeth in the gears you use.
30.9.1 Changes in the Direction of Your Robot
Because the small 8-tooth gear on the motor axles turns the larger 24 tooth gears (that contain the wheels) in the opposite direction to the motor axles, the robot will now run backwards.
If you wish it to go in the same direction as before, you will have to reverse the direction of the motors in your NXT-G program. This may mean the your program will indicate the your robot is going forwards, when in fact it is going backwards – this is just one of the complications you will get used to, as you become more comfortable with using gears.
30.9.2 Changes in the Speed of Your Robot
You will see that the small 8 tooth gear wheel turns faster than the bigger 24 tooth gear connected to the tyres. If you have not noticed this, take a look at your robot now to check that this is so. How much faster does it turn?
It turns out that this depends on the number of teeth in the gears. The smaller gear will have to turn three times (8 times 3 = 24) to make the 24 teeth larger wheel turn once.
In general, we say the speed ratio of these gears is 24/8 = 3 to 1. This means that the robot will only travel as 1/3 as fast using these gears, and also travel only 1/3 as far.
We can use this type of calculation to predict the behaviour of any gear combination we will use with our robot, if we know the number of teeth on each of the gears we are using.
30.9.3 Climbing Ability
Because the small gear attached to the motor turns three times for every time the larger gear connected to the tyre turns, one turn of the tyre now has all the energy of three turns of the motor. This turning force is called “torque” by engineers. So, theoretically our robot should be able to climb steeper slopes as the 3 to 1 gearing will theoretically give it three times the torque. Does this happen? If you have not tried it, see what your robot does on these steeper slopes.
If your robot is the same as my robot, it does climb steeper slopes than it did before I added the gearing. But it does not climb slopes that are three times as steep! The tyres of my robot start to slide on steeper slopes, even though my robot’s tyres are still going round. There is not enough friction between my robot’s tyres and the mountain side for all the torque to be useful. Hmm… Maybe if I put a rope around my axles, my robot may be able to pull itself up these steeper slopes – but that is something we can try another day…
Mentor note: To see this Challenge in the form of an 8 page Microsoft Word 2003 document, click here.